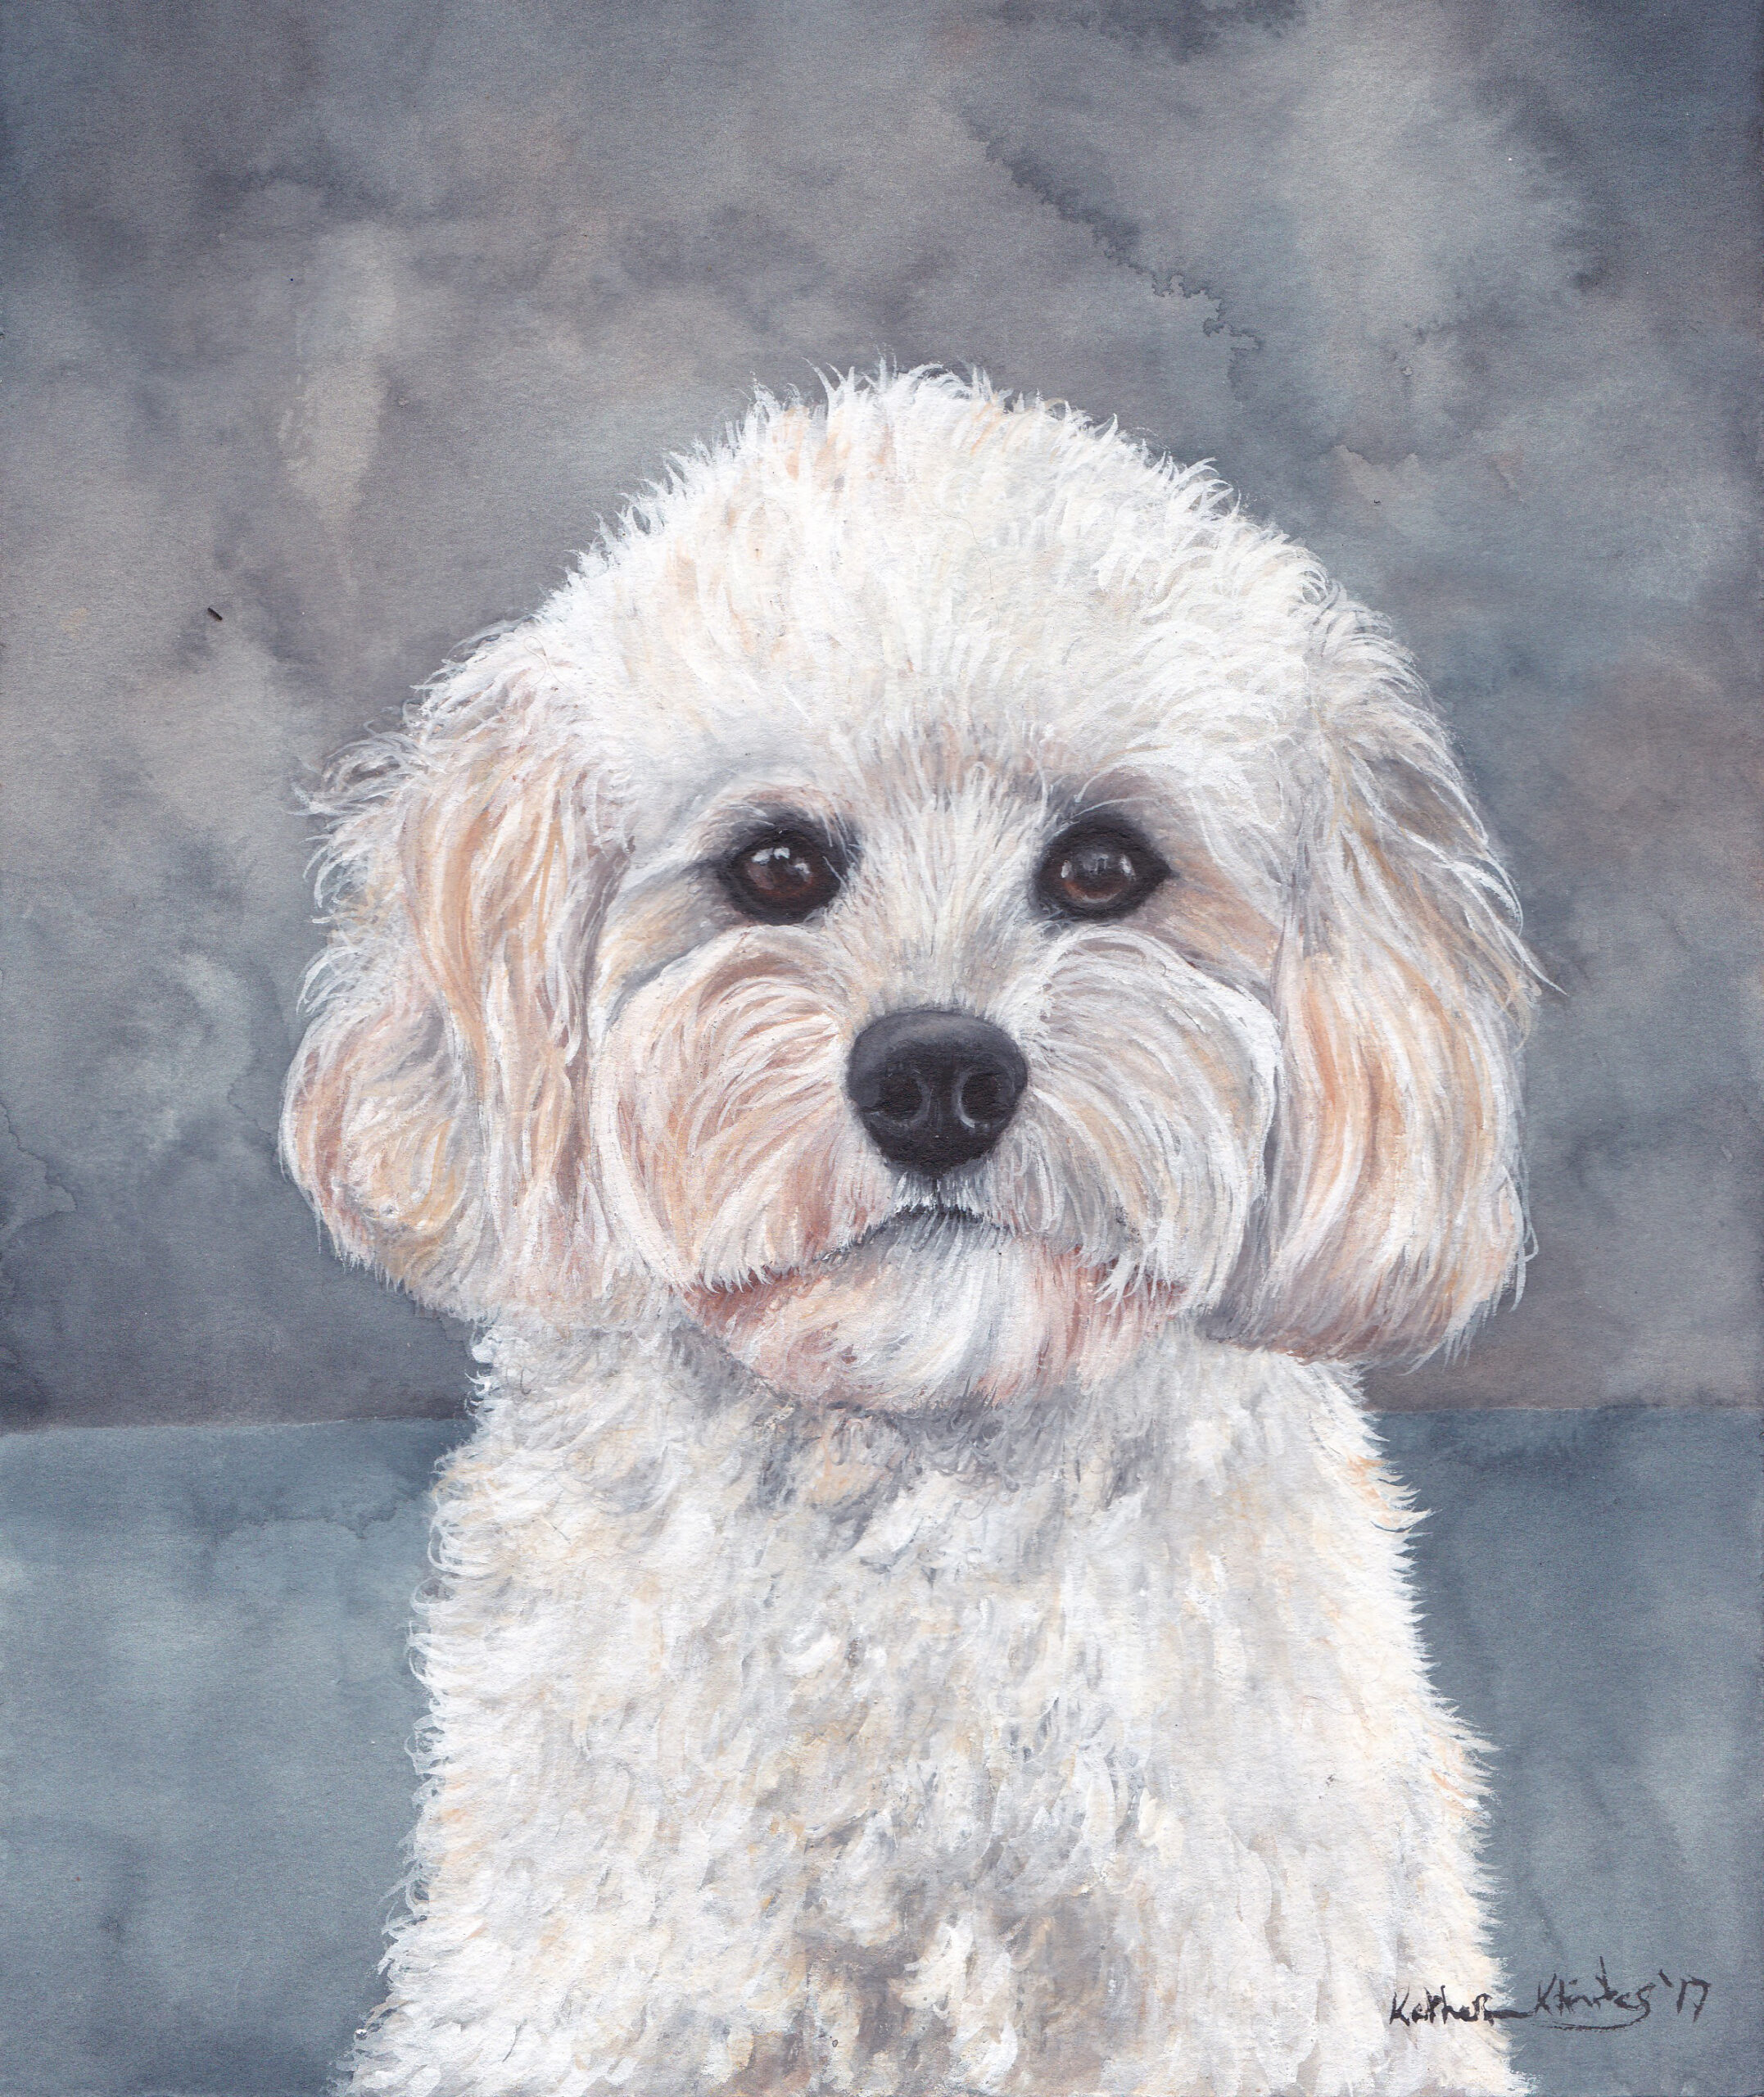
Creating a watercolor pet portrait is a journey filled with attention to detail, emotion, and creativity. Over the years, I’ve honed my craft as a pet portrait artist, capturing the essence of countless furry companions in vibrant watercolor art. Today, I’m excited to share my step-by-step process for crafting these unique pieces, combining my passion for painting and my connection to animals.
Step 1: The Drawing Foundation
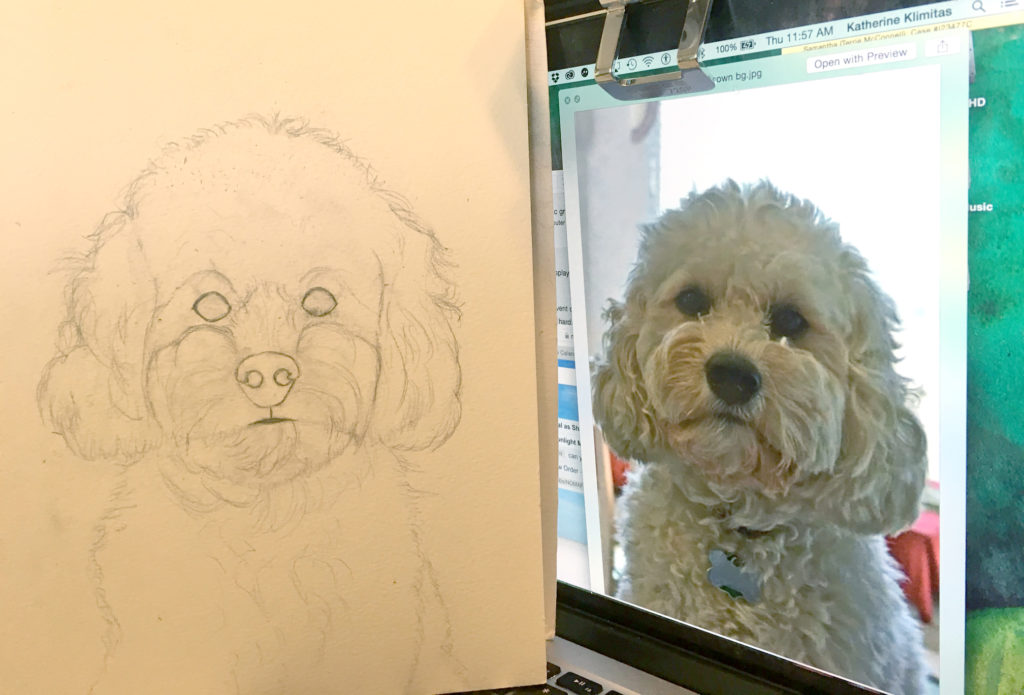
Every painting begins with a solid drawing. An art teacher once told me, “A great painting starts with a great drawing,” and that advice has stayed with me. The initial sketch maps out the pet’s facial features and major shaded areas. While I avoid heavy shading to prevent muddying the paint, getting the proportions right is crucial. It’s often the trickiest yet most essential part of the process.
Step 2: Background and Body
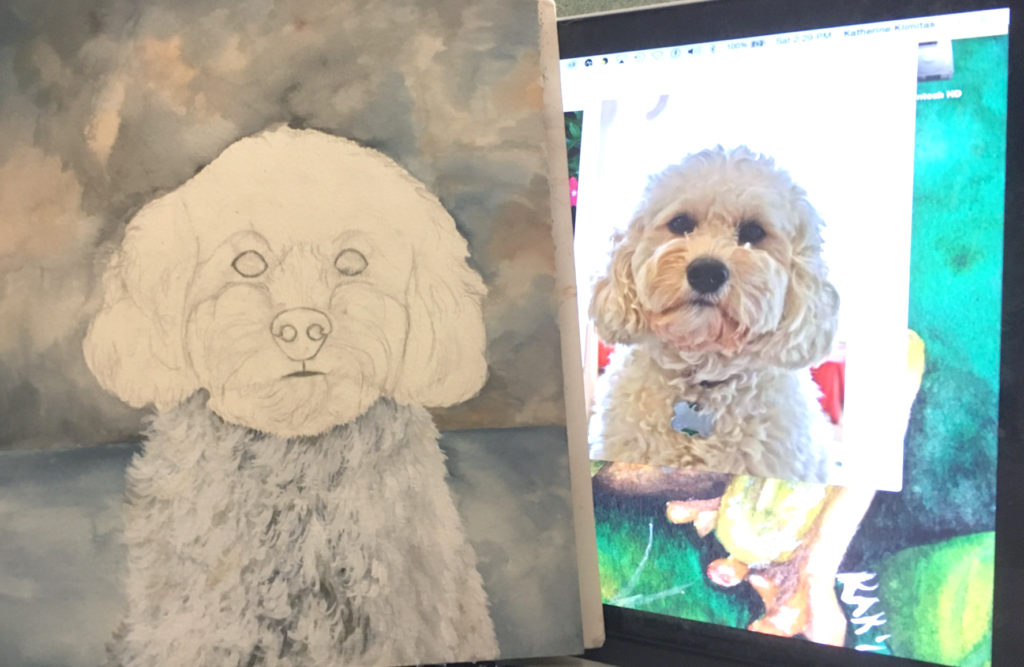
I typically work from the background to the foreground to save time and ensure smooth layering. For the background, I generally choose semi-abstract tones that complement the pet without overshadowing it. A subtle horizon line grounds the subject and avoids the “floating” effect.
Next, I move on to the body, building layers of paint to mimic the pet’s unique fur texture. For a fluffy dog, for example, I might layer shades of white, gray, yellow, and brown. Each layer adds depth and realism, bringing the animal’s coat to life.
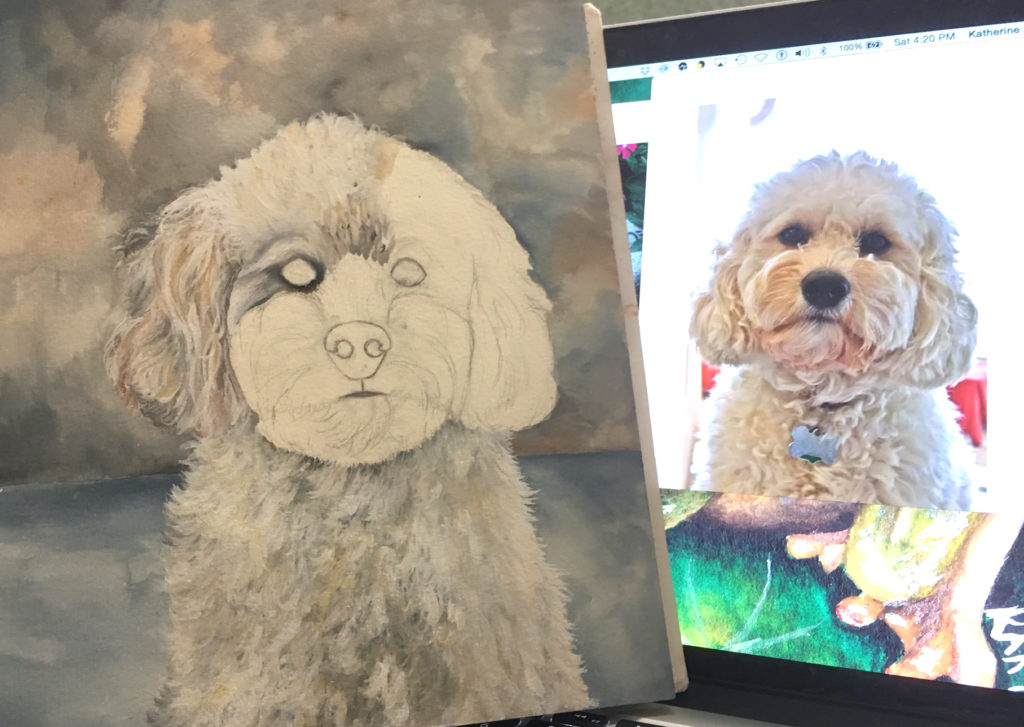
Step 3: Starting the Head
The face is where the magic happens—it’s the soul of the piece. Here, I carefully layer colors to create the illusion of three-dimensional features. This stage requires meticulous shading to define the pet’s facial structure. Often, I bring in my mom (a veterinarian with a keen eye for detail) for feedback.
Step 4: Perfecting the Head
Once the hair, nose, and general features are painted, I refine the overall colors with thin glazes to achieve the perfect balance. This part requires patience to avoid overworking the paint, which can lead to unwanted bleeding or muddiness.
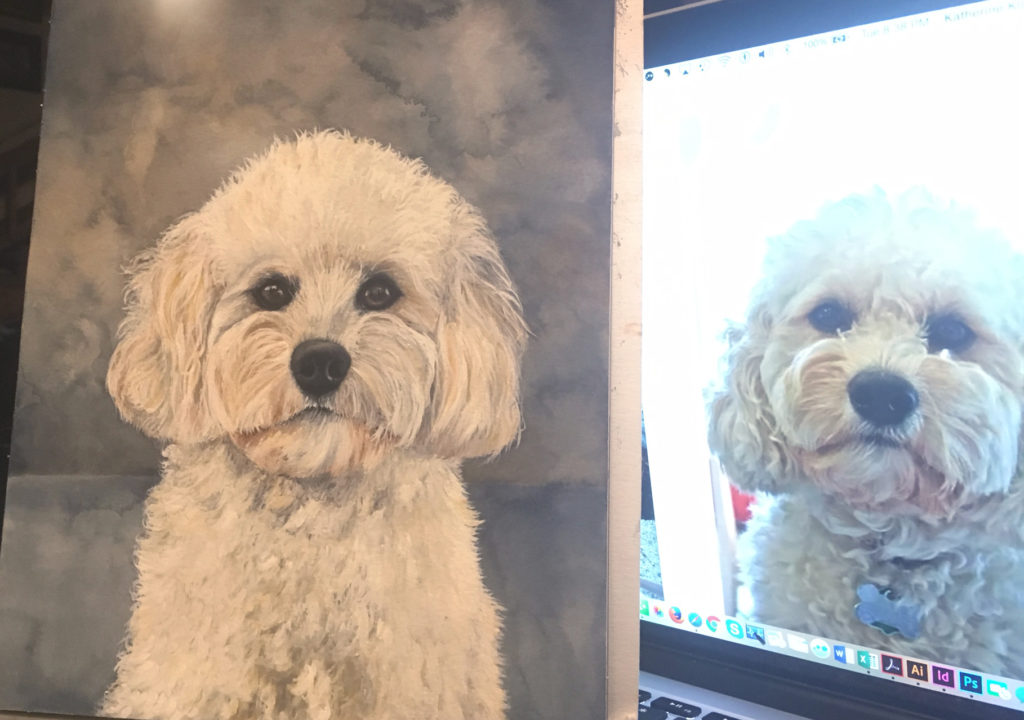
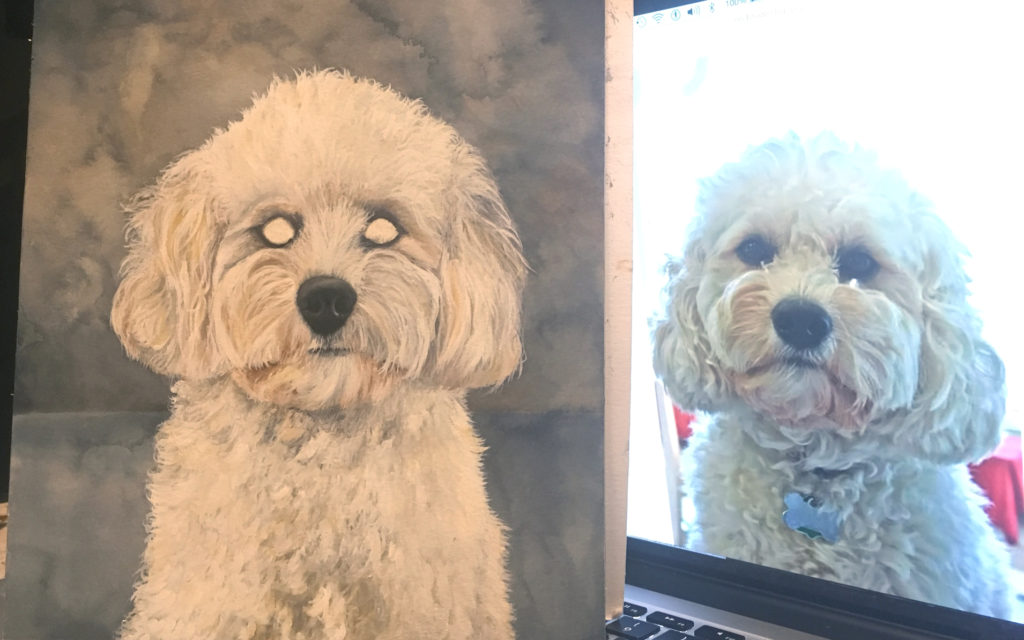
Step 5: Capturing the Eyes
The eyes are the heart of any pet portrait. They hold the personality and emotion of the animal, making this step critical. I take extra care to ensure they are lifelike and expressive. Clients often tell me this is where my skill truly shines.

Step 6: Adding Finishing Touches
With the eyes complete, I add the final details: eyelashes, whiskers, and any subtle highlights. This is when my mom steps in again for a final critique, catching things I might have missed. Her expertise with animals is invaluable in ensuring my watercolor pet portraits capture the essence of the pets I paint.
Why I Love Painting Pets
As a disabled artist, my work brings motivation and joy not just to me but to my clients. Whether it’s commemorating a beloved pet or providing comfort after a loss, each pet painting holds deep meaning.
Commission Your Own Watercolor Pet Portrait
Looking for a unique gift? Prices vary based on size, and I require 2–3 high-quality photos of your pet with accurate lighting and color. Send me a message to reserve your spot and bring your furry friend to life on canvas.